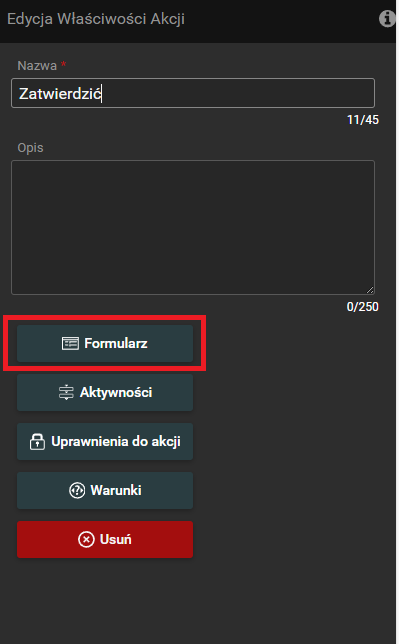
Formularz uruchamiania akcji
Aplikacja Datapolis Workbox umożliwia tworzenie formularzy uruchamiania akcji. Tylko dla początkowej akcji nie można utworzyć formularza uruchamiania akcji.
Aby utworzyć formularz uruchamiania akcji, należy najpierw otworzyć menu akcji. Można to zrobić klikając dwukrotnie na akcję lub klikając ikonę edycji w menu, które pojawia się po najechaniu myszką na akcję.
W oknie edycji właściwości akcji należy kliknąć Launch Form.
Po kliknięciu przycisku Formularz zostanie wyświetlone to okno.
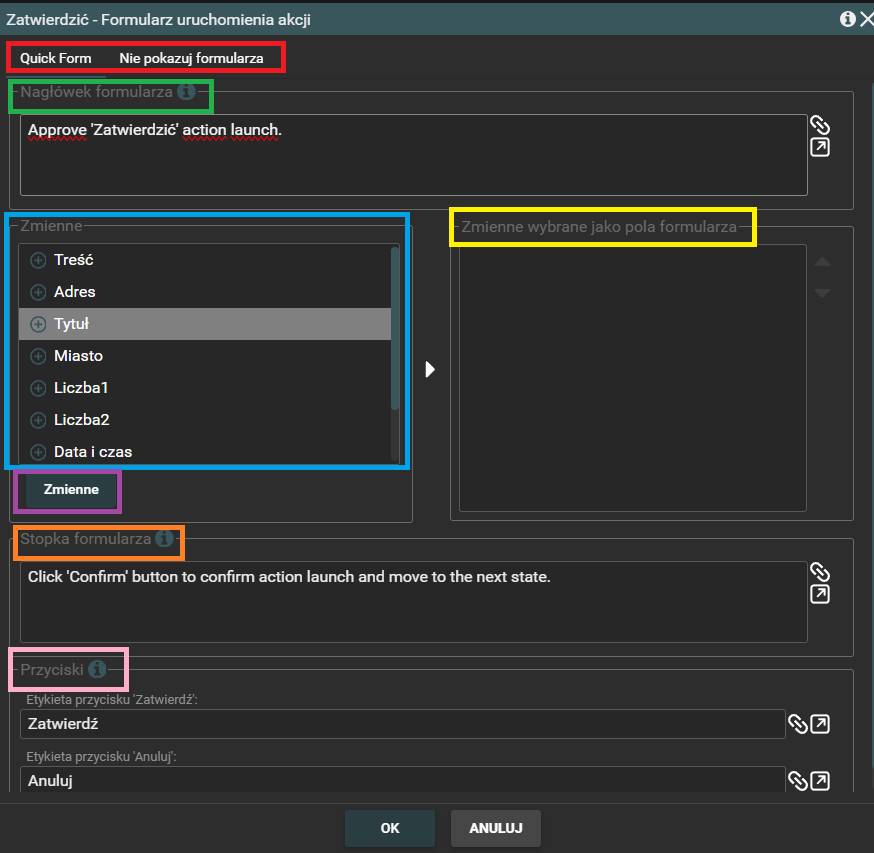
W tym oknie można zdefiniować ustawienia formularza uruchamiania akcji:
- Wybrać pomiędzy szybkim formularzem lub brakiem formularza dla akcji - pole oznaczone czerwoną ramką.
- Zmienić nagłówek formularza. (Tekst, który będzie wyświetlany nad polami formularza) - pole oznaczone zieloną ramką.
- Można wybrać zmienne dla formularza. Wyświetla wszystkie zmienne utworzone w przepływie pracy - pole oznaczone niebieską ramką.
- Po kliknięciu przycisku zmiennej można dodać nową zmienną - pole oznaczone fioletową ramką.
- Wyświetla zmienne wybrane jako pola formularza - pole oznaczone żółtą ramką.
- Edycja stopki formularza. (Tekst, który będzie wyświetlany poniżej pól formularza) - pole oznaczone pomarańczową ramką.
- Możliwość zmiany tekstu przycisku „Potwierdź” i „Anuluj” dla formularza uruchamiania akcji - pole oznaczone różową ramką.
Najważniejszym etapem tworzenia formularza jest przypisanie zmiennych przepływu pracy do akcji. Zmienne będą przechowywać dane dostarczone przez użytkowników. Przypisania można dokonać w głównym oknie Edytora formularzy.
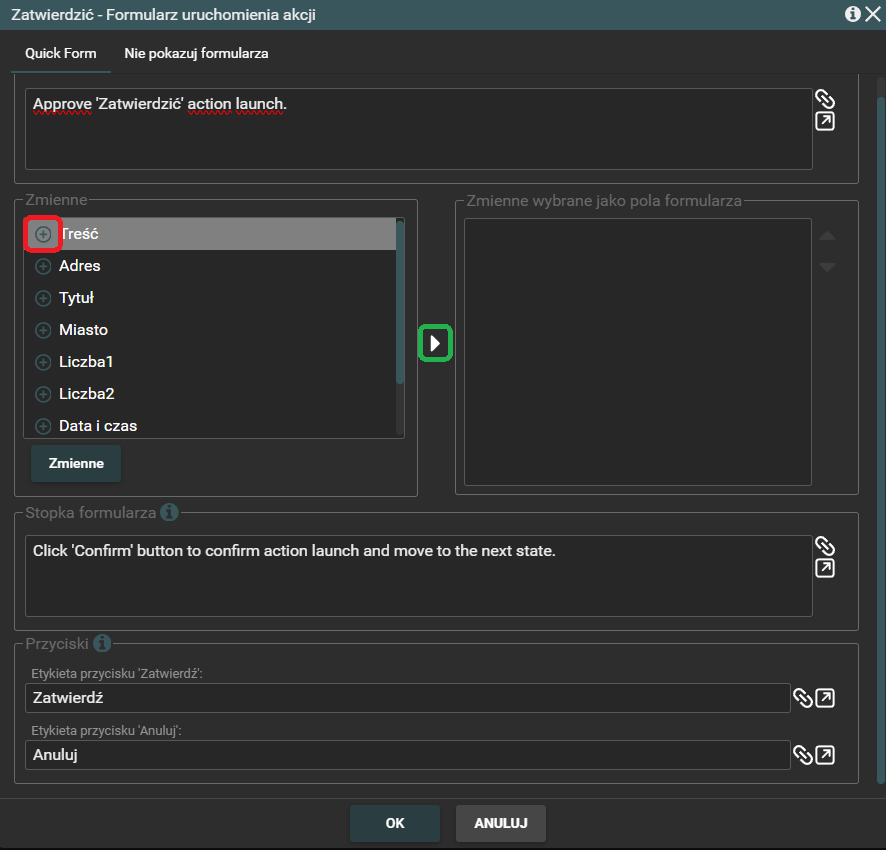
Zmienną można przypisać na następujące sposoby:
- Klikając dwukrotnie zmienną.
- Klikając pojedynczo ikonę plusa przypisaną do zmiennej. (Ikona plusa jest oznaczona czerwoną ramką na powyższym zrzucie ekranu).
- Pojedyncze kliknięcie zmiennej. Tło wybranej zmiennej zmieni kolor na szary. Następnie należy kliknąć ikonę trójkąta oznaczoną zieloną ramką na powyższym zrzucie ekranu.
Zmienne przypisane do formularza zostaną wyświetlone w polu oznaczonym czerwoną ramką na poniższym zrzucie ekranu.
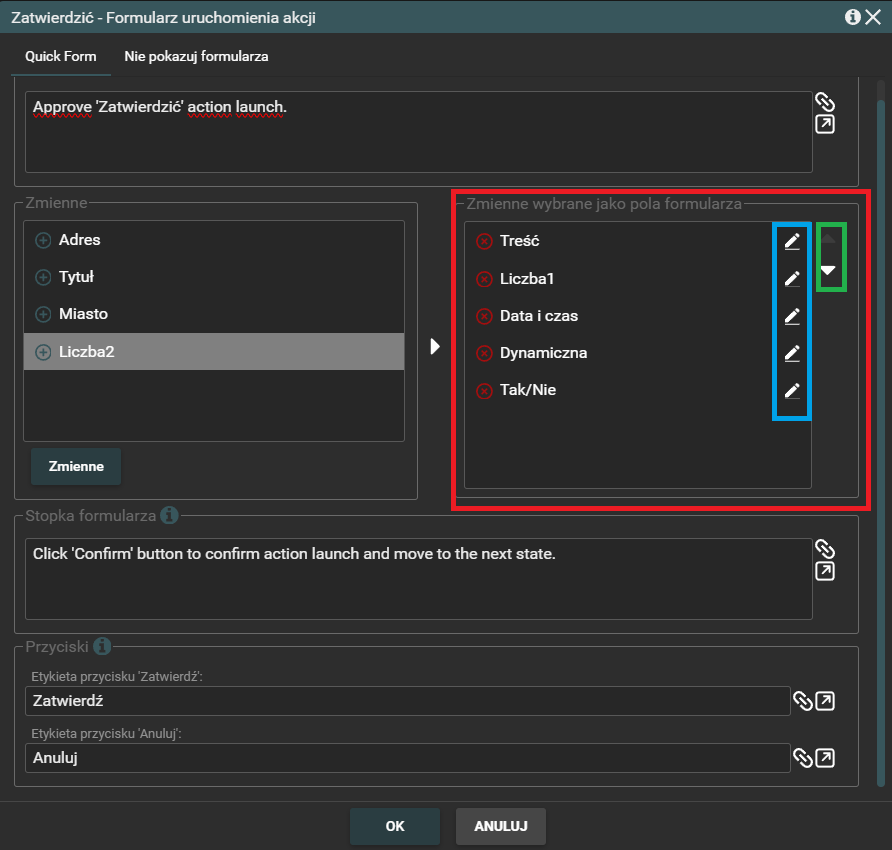
Po przypisaniu zmiennych do formularza należy kliknąć przycisk OK. Okno zostanie zamknięte. Możesz również pozostać w oknie, aby dokonać dalszych ustawień. Nie zapomnij kliknąć OK po ustawieniu właściwości Action Launch Form.
Każde pole ma zestaw właściwości definiujących jego wygląd i akceptowane dane. Właściwości te można ustawić w oknie „Właściwości pola formularza”, do którego dostęp uzyskuje się poprzez dwukrotne kliknięcie przypisanej zmiennej lub ikony ołówka (ikona oznaczona niebieską ramką)
Okno „Właściwości pola formularza” wygląda następująco:
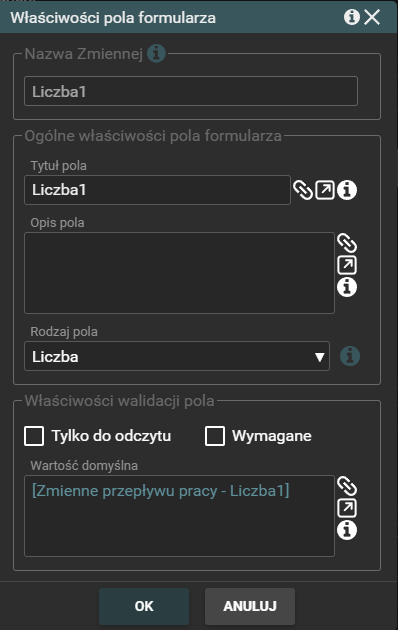
W oknie pokazanym powyżej można:
- zmienić tytuł pola
- podać opis dla pola
- ustawić właściwości walidacji pola
- wprowadzić wartość, która ma być wyświetlana w tym polu po załadowaniu formularza.
Po ustawieniu właściwości pola formularza należy kliknąć OK.
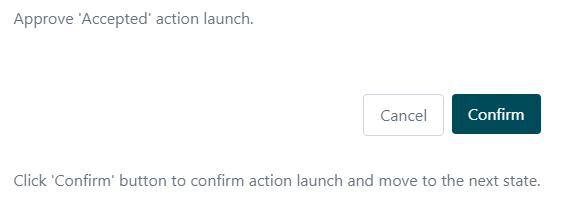
Formularz uruchamiania akcji zostanie wyświetlony, gdy użytkownik kliknie wybraną akcję, do której przypisany jest formularz. Formularz uruchamiania akcji wygląda następująco.

Oprócz formularza, który można wypełnić, aplikacja Datapolis Workbox posiada opcję „Quick Form” dla akcji.
„Szybki formularz” wygląda następująco.
Uwaga: Ważne jest, aby zrozumieć różnicę między zmiennymi przepływu pracy a polami formularza. Zmienna przepływu pracy to abstrakcyjny obiekt, w którym przechowywane są dane i z którego można je pobrać i wykorzystać w przepływie pracy.
Pole formularza jest częścią interfejsu użytkownika, miejscem, w którym użytkownik może wprowadzić dane, które zostaną przypisane do zmiennej przepływu pracy. Pola są generowane automatycznie, gdy użytkownik inicjuje wykonanie akcji. Dla każdej zmiennej przypisanej do danej akcji generowane jest jedno pole.
Każde pole ma określony typ, związany z rodzajem danych, które może gromadzić. Jest to prosty sposób na wymaganie od użytkownika podania określonych danych. Ponadto pole będzie renderowane w taki sposób, aby pomóc użytkownikowi w dostarczeniu prawidłowych i dobrze sformatowanych informacji. Na przykład dla pola „Date time” zostanie wygenerowana kontrolka wyboru daty.
Uwaga: Zmienne przepływu pracy mają swoje własne typy, więc można używać tylko typów pól zgodnych z odpowiednią zmienną.