How to use a Self-timer
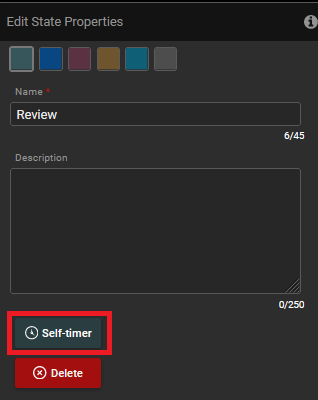
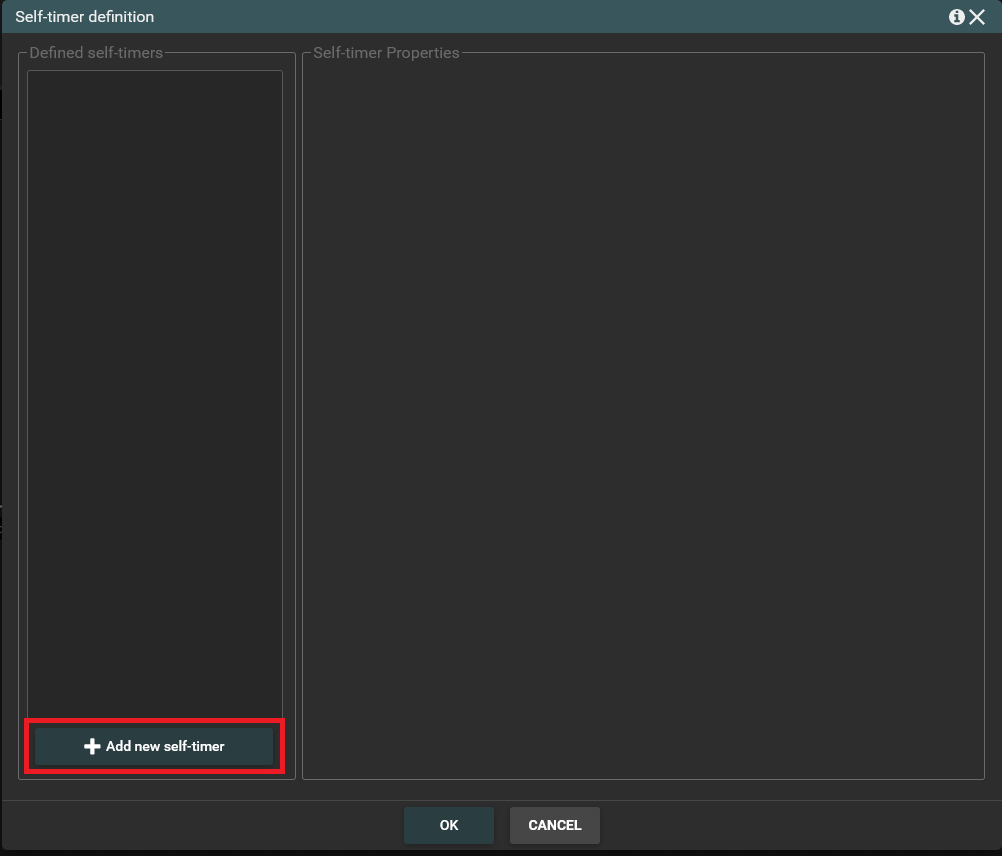
Self-timer is used to launch an action after a certain time. To set a self-timer you should open edit state properties. Then in the edit state window you should click on the Self-timer button. When the following window appears, you need to click Add new self-timer button.
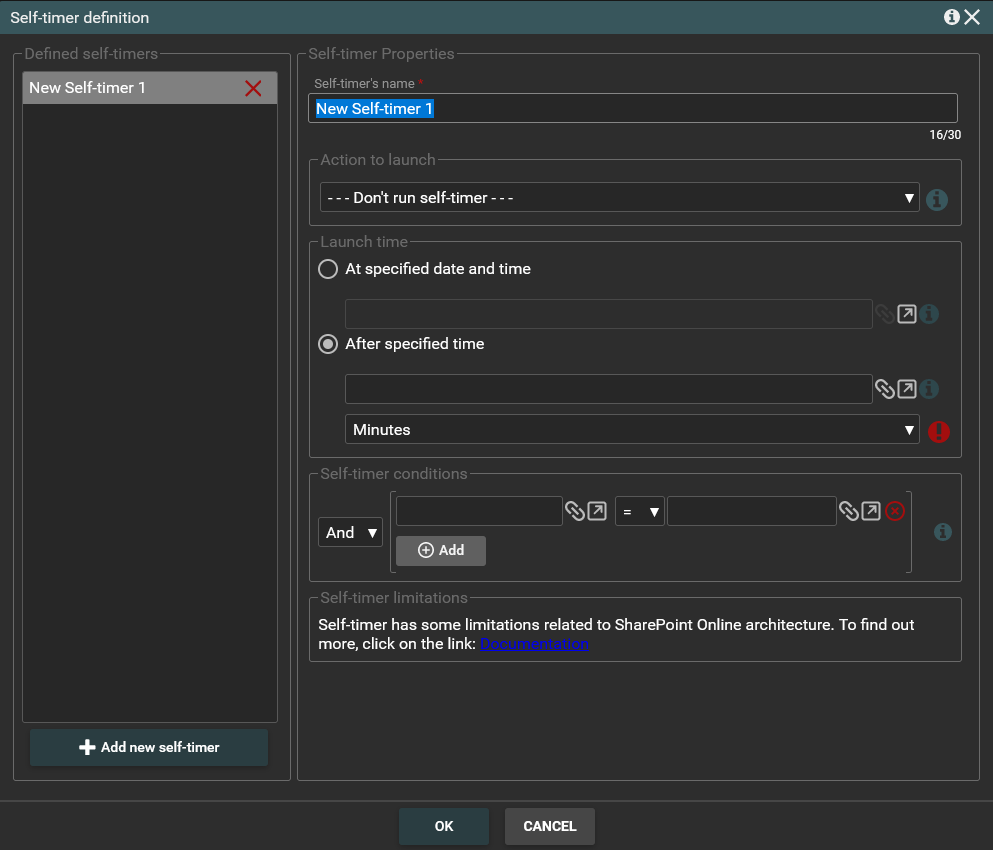
In the next window you have to configure a self-timer properties. At first you have to choose an action which will be launched by self-timer. Then you have to set a number of minutes, hours or days after which this action should be launched. You can also set a fixed date and enter timer conditions. You can too define the self-timer name. When you have filled in all the fields, click OK to save the changes.
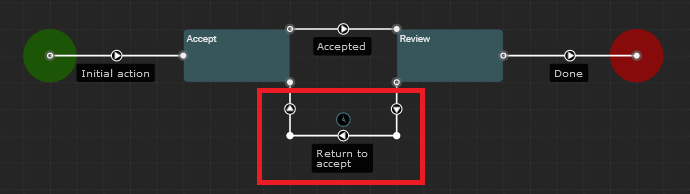
An appropriate mark will appear above the action for which the self-timer is set.
Self-timer limitations
Self-timer has some limitations related to SharePoint Online architecture. To find more information about limitations click here.