Create and Run Your First Workflow
After properly installing and configuring Datapolis Workflow you may create your first workflow. Just follow below steps to accomplish it in just several minutes.
Add a new list
In the beginning you have to add a new list to SharePoint. On your site you should to click New on the ribbon. Then you have to select the list from the drop-down list.
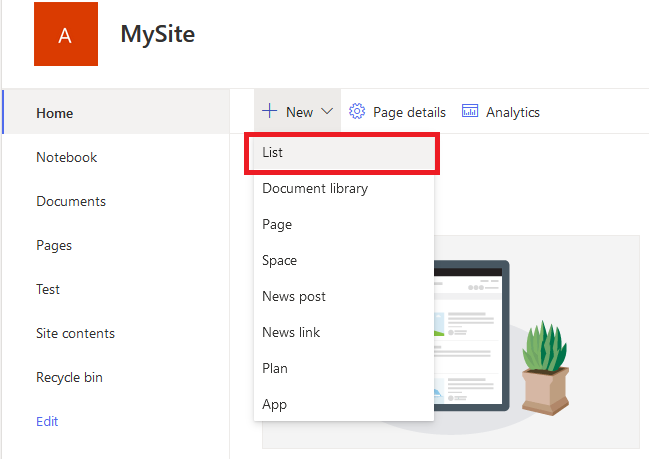
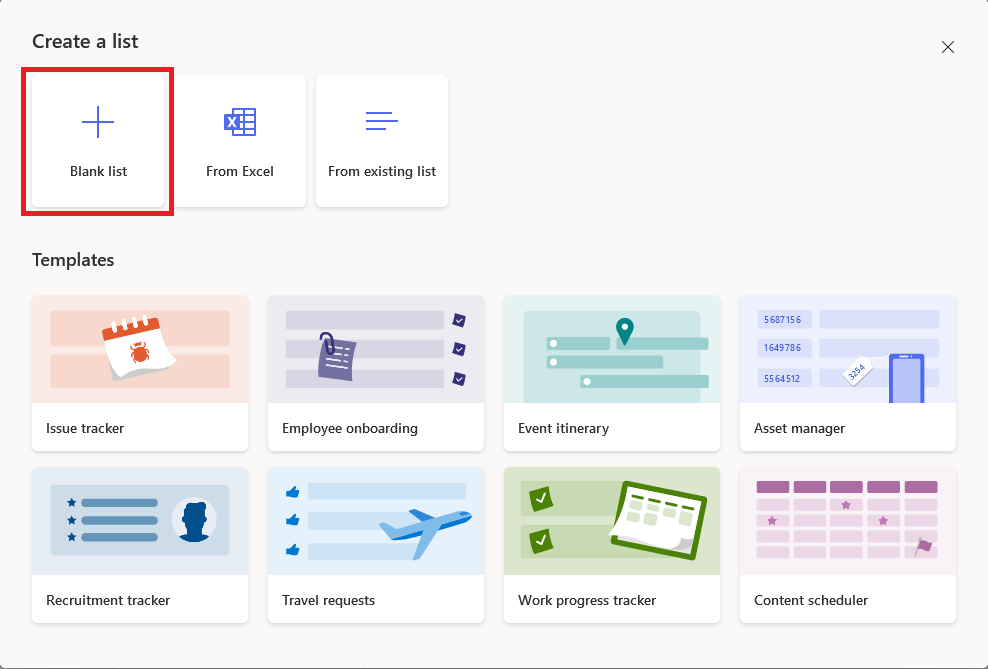
The window "Create a list" will open. You have to click on Blank list button.
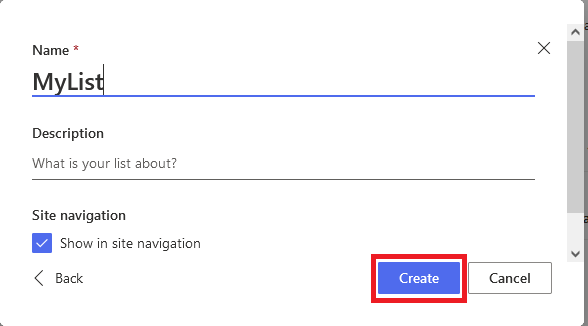
In the next window, you have to enter a name for the list in the appropriate field and click Create button.
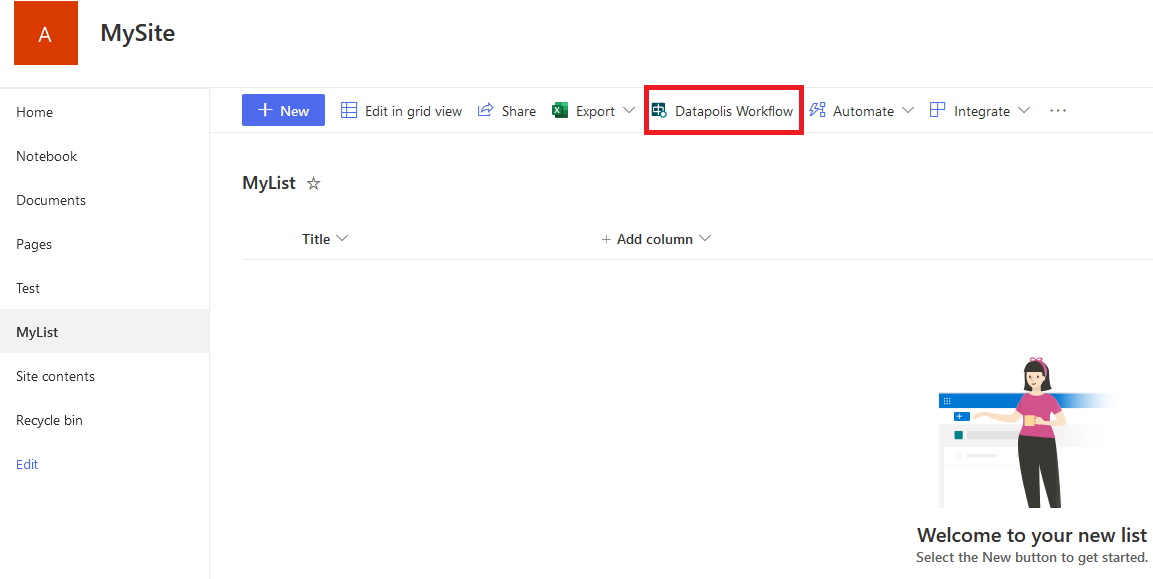
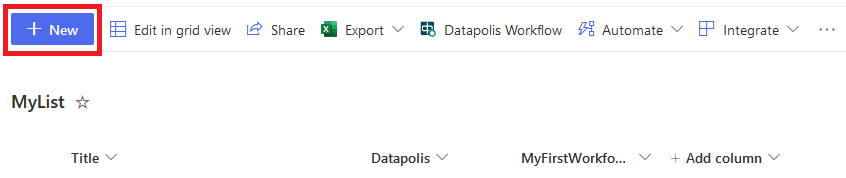
After that you will be redirected to the page of the newly created list. Your list will look like the screen-shot below. Now you need to click the Datapolis Workflow button on the menu panel. The Datapolis Workflow button is marked with a red frame on the screen-shot.
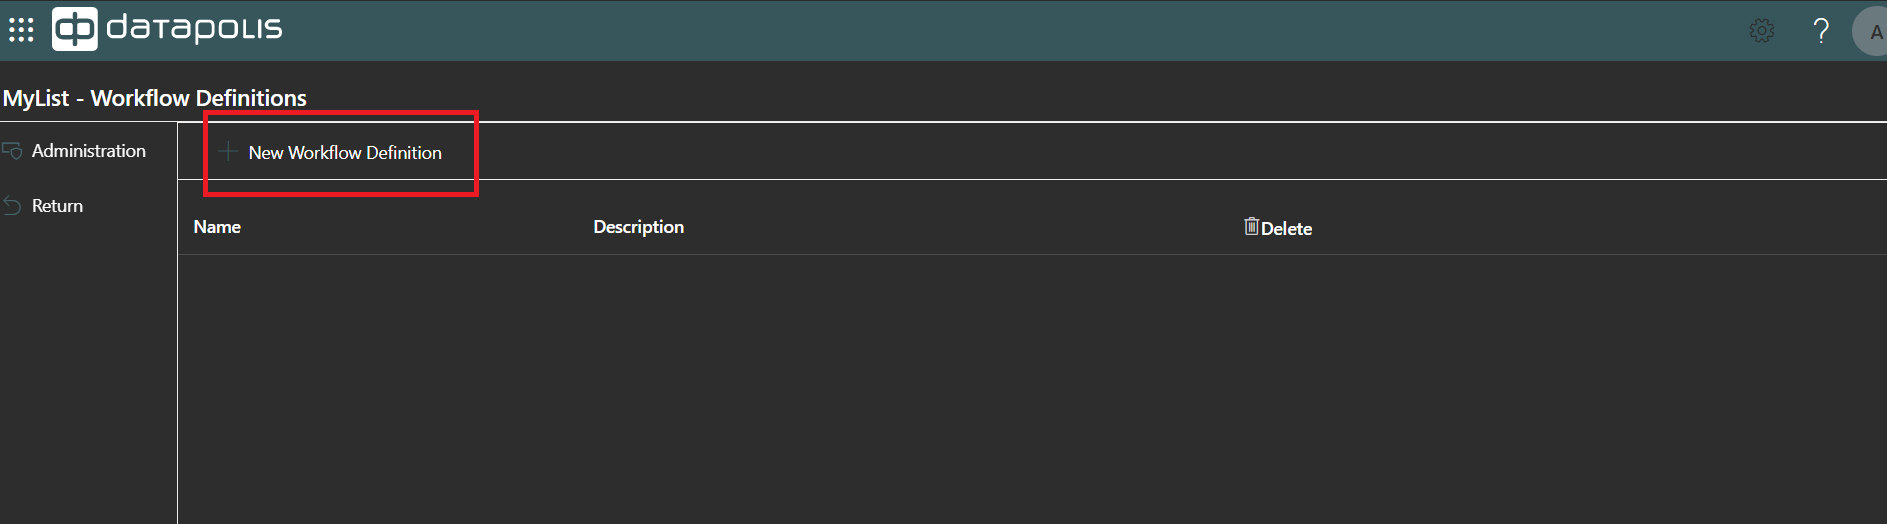
Add a workflow on the administration page
When you click on the Datapolis Workflow button you will be redirected to the Workflow Administration page where you need to click on New Workflow Definition.
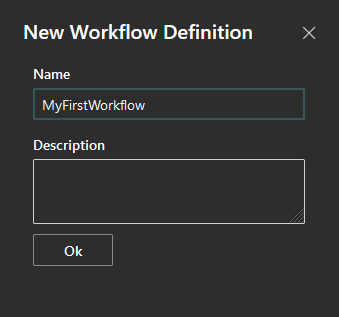
Then a menu side panel will appear on the right side, in which you have to fill in the name field and click the OK button. You can also complete Description field by providing a few sentences characterizing the created workflow.
Create your workflow in the designer
After filling in the fields you will be redirected to the designer, where the workflow is shaped. The designer looks like this.

Now you can add states, actions and deploy the workflow. You need to drop and drag states and connect them by actions. On the screen-shot below the state add icon is marked with a red frame and the action add icon is marked with a green frame. 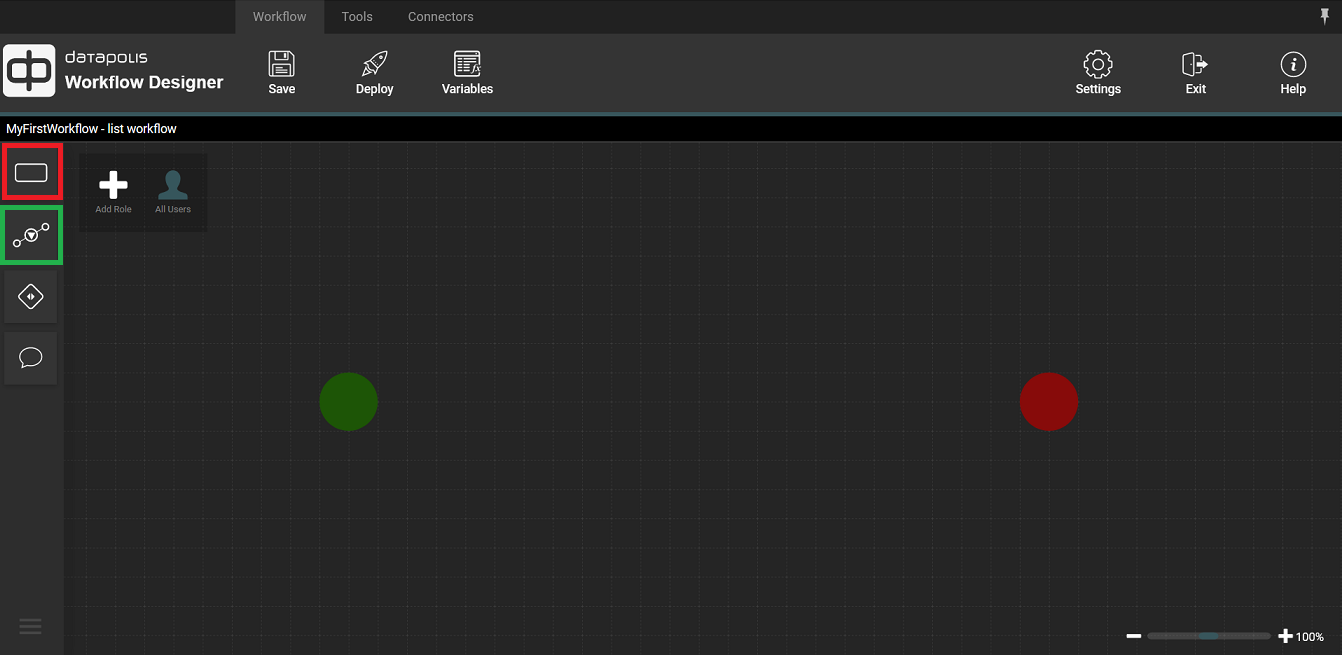
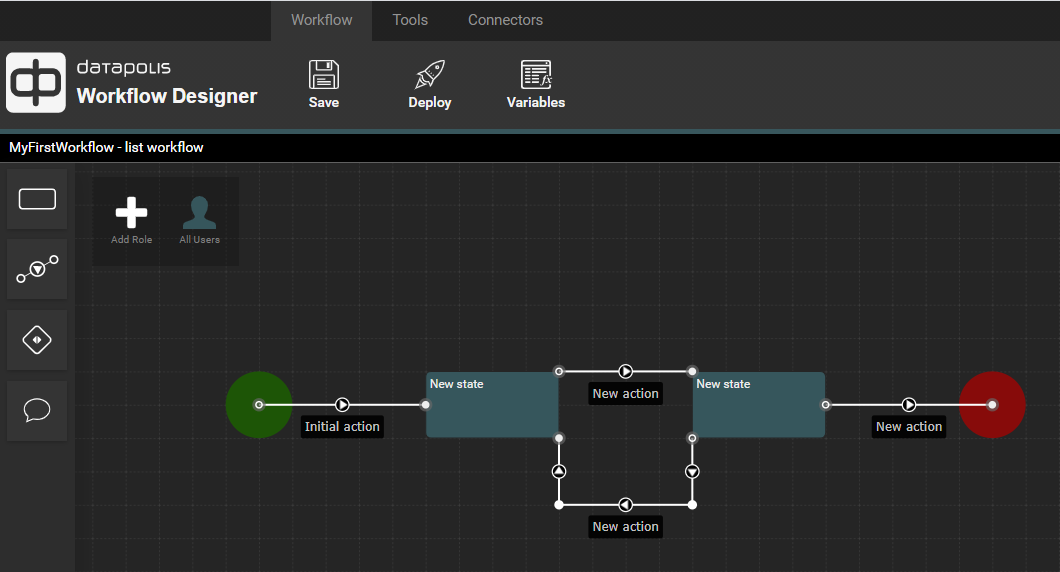
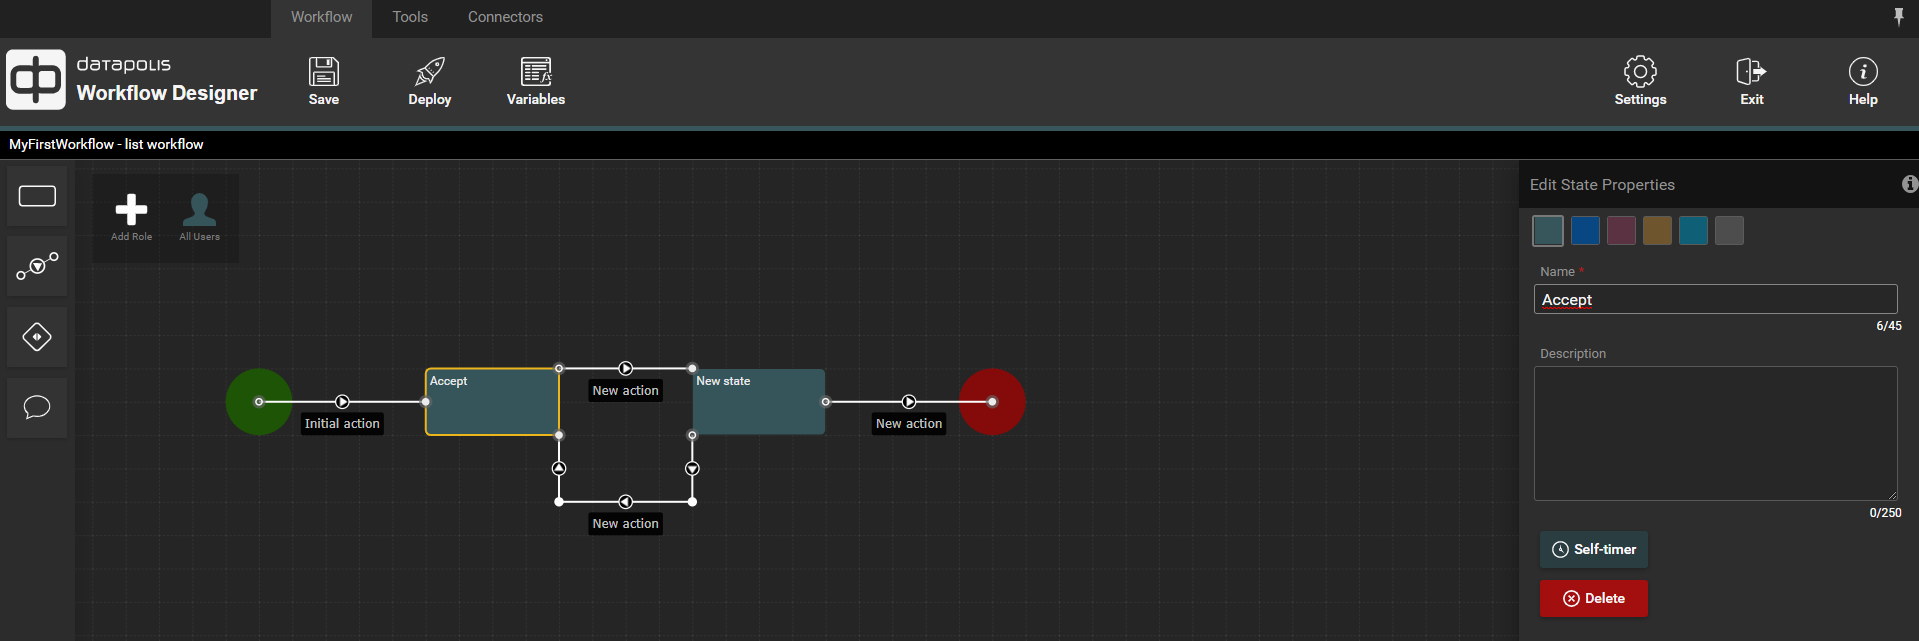
You can create the workflow as shown on the screen-shot below. The states you add will be named as "New states" by default. The same is true for added actions. Each added action will be named a "New action" by default. The initialization action is an exception. This action is the first in the workflow and goes from the starting point (green circle). The default name of this action is "Initial action".
Now you should rename states and actions so that each of these elements has its own name. Thanks do this, the user will be able to see at what point the workflow is. To change state name you need to open state menu. It may be done by double-click on the state you want to edit or by clicking edit icon (pen icon) on menu that shows up, when you hover mouse on state. In the same way you can change any action name.
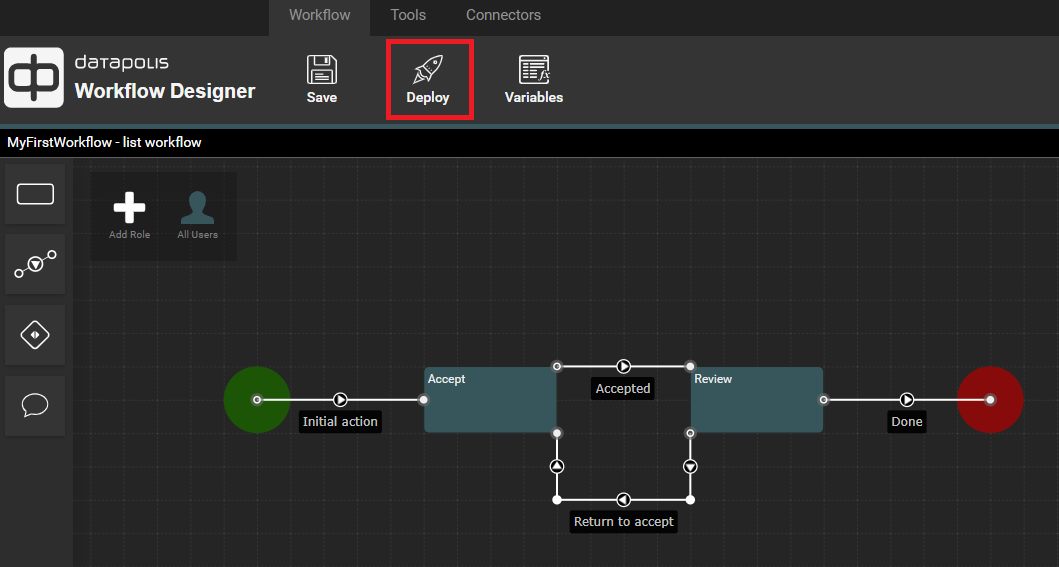
The created workflow should looks like on the screen-shot. Now you need to deploy workflow. To do this, click on the Deploy button.
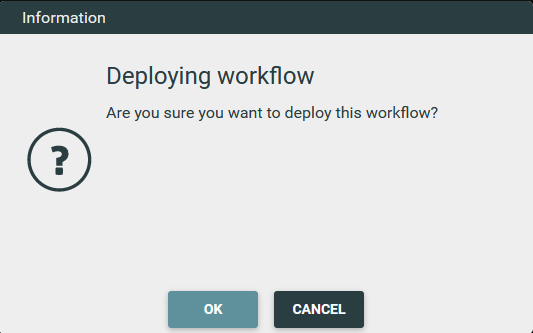
A modal window will appear to confirm. Subsequently click OK. First the workflow will be saved and then deployed.
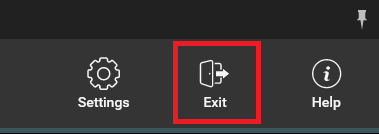
When the workflow is deployed you can close the designer. Click the Exit button. A modal window will open to confirm the designer closing operation. To complete the operation, click OK.
The designer will close and you will return to the workflow administration page. On this page, click Return (marked with a red frame on the screen-shot) you will be redirected to the SharePoint list for which you created the workflow.

Start workflow instance
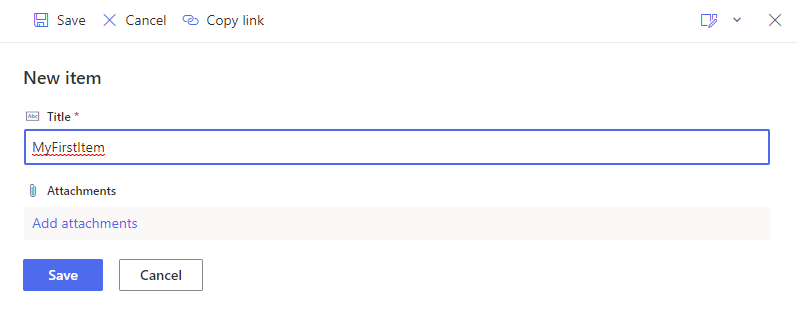
The Datapolis and MyFirstWorkflow columns appeared on the list. The column with the name of the workflow will display the state of the workflow. To start workflow, an item on the list is needed. To add an item to the list, click the New button.
The adding item window will open. Enter name in the appropriate field and click the Save button.
A new item with the name the name you entered will appear in the list. When this item will appears, the workflow will be started. In the column with the workflow name, you will see "Changing State...".
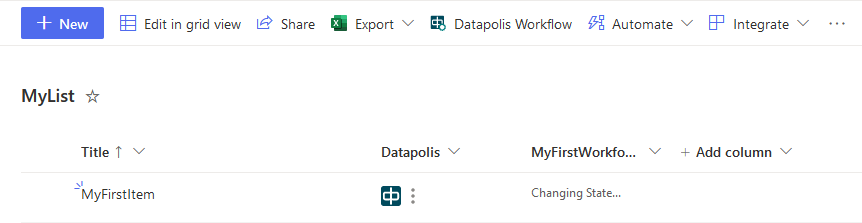
After a while, the name of the first state in which the workflow is currently located will appear in the column.
Launch workflow action
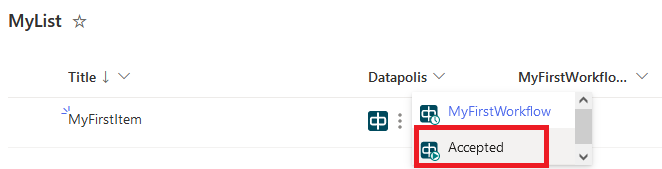
Now you can run an action. To do this, click on the three dots in the Datapolis column. A drop-down list appears with the name of the workflow and the available actions. Only one action is available. So you have to click on the Accepted action. After that, a rotating wait icon will appear in the center of the page. You can also run actions in other ways. Learn more about other ways to run actions.

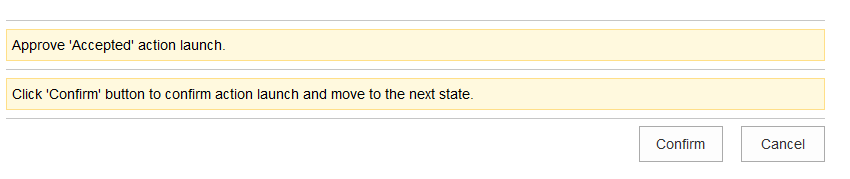
Next the action launch form will be displayed. For our action it will be a "Quick Form". A form of this type is set by default for each action. To learn more about action launch form types click here.
"Quick Form" looks like this. In this form click Confirm to launch a workflow action.
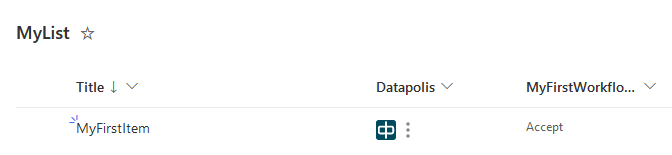
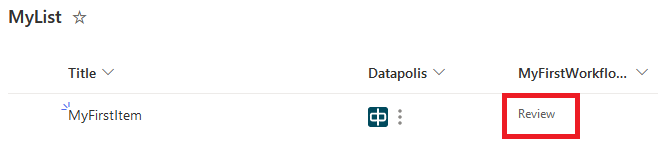
You will be redirected back to list view. Right now workflow is moving from one state to the other. After a while you will see on list that state has changed.
View workflow history
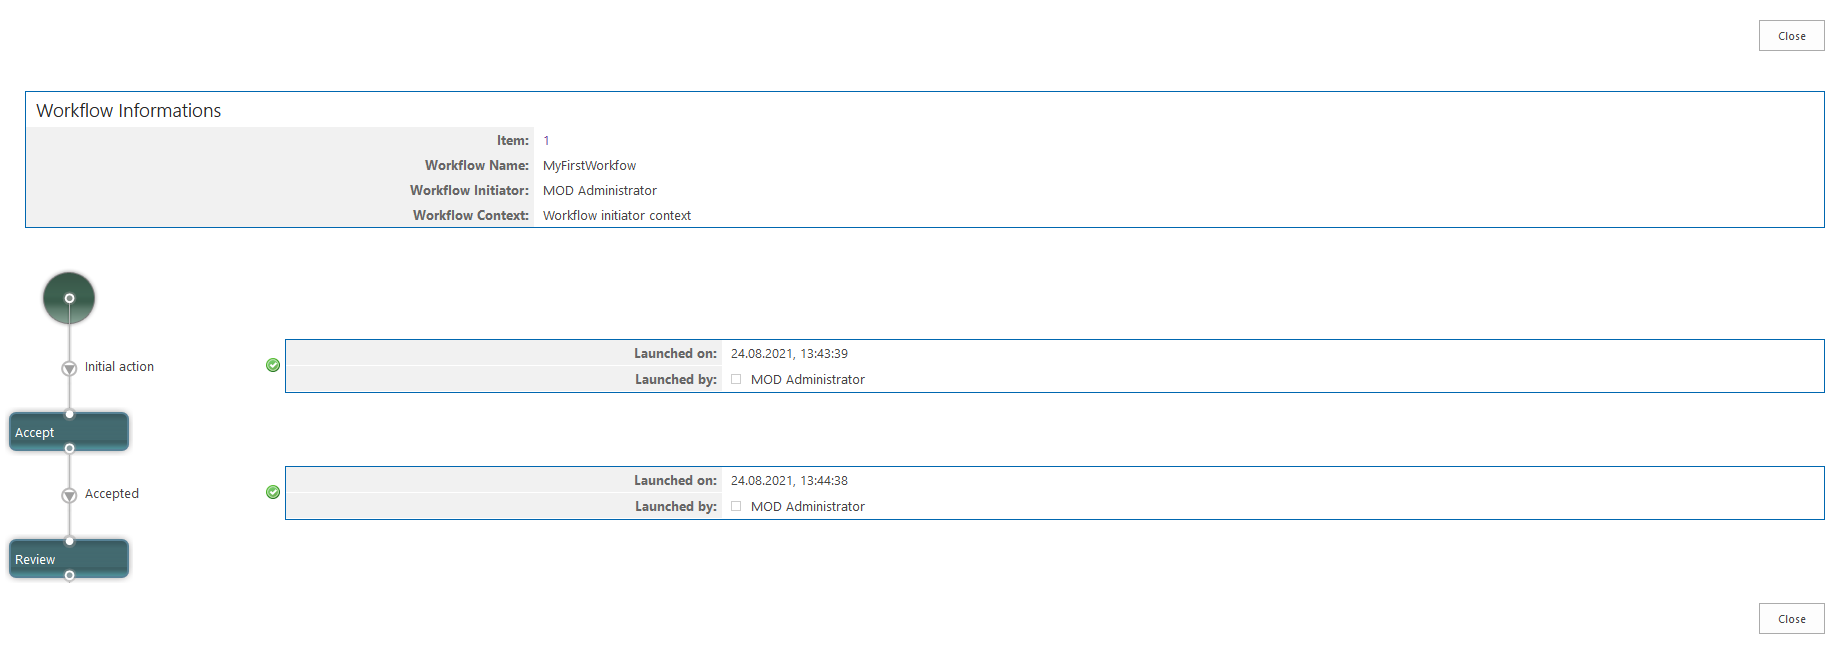
There are several ways to view the workflow history. One of them you will know in a moment. To see the workflow history preview you should select and check the list item on which you want to see the history. Then the History icon will be displayed in the menu at the top. After that you should to the History icon click. (The icon is marked with a red frame on the screen-shot below.) If only one workflow was running on the item, the history page will open immediately.

A page with history will open. You can see all of state changes - actions, activities and forms data.
Summary
Congratulations! You just created and used your first workflow. You may now go to User Guide section extend your knowledge. Good luck and have fun!