Action Launch Form
Datapolis Workflow application enables creating action launch forms. Only for a initial action you cannot create the action launch form.
To create action launch form at first you need to open action menu. It may be done by double-click on the action or by clicking edit icon on menu that shows up, when you hover mouse on action.
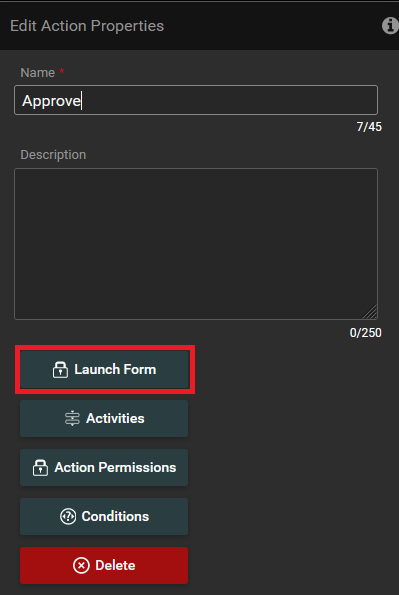
On the window edit action properties you need click on Launch Form.
After clicking the Launch Form button will be displayed this window.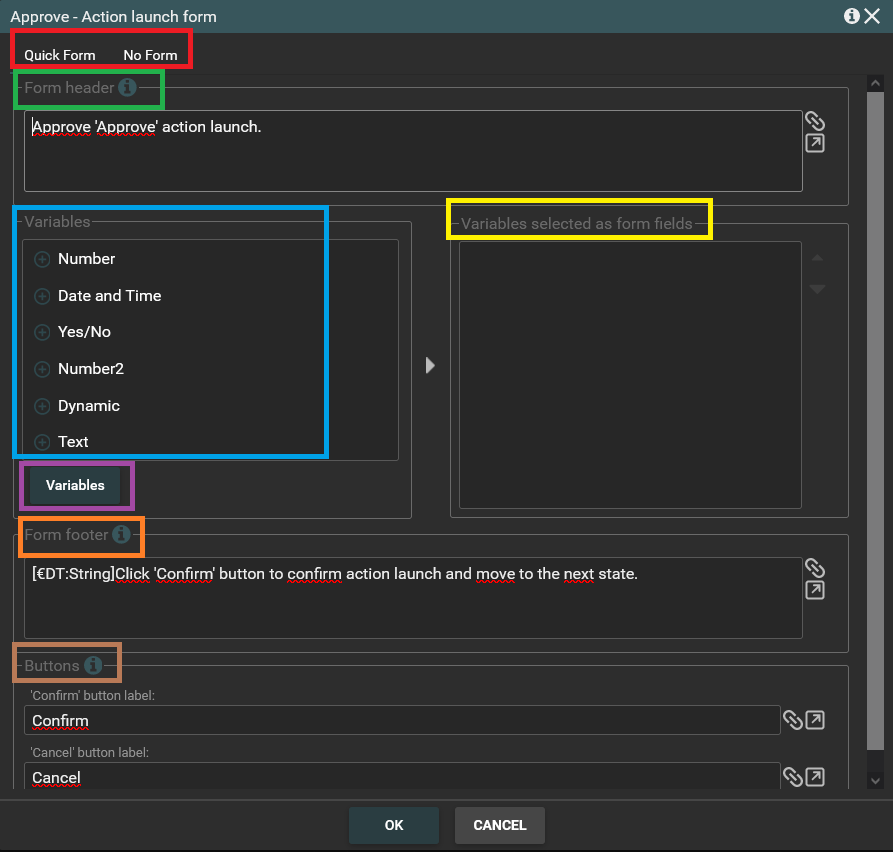
In this window you can define settings of the action launch form:
- Choose between a quick form or no form for the action - the field marked with a red frame.
- Change a form header. (Text which will be displayed above form fields) - the field marked with a green frame.
- You can select variables for the form. Displays all variables created in the workflow - the field marked with a blue frame.
- When you click on variable button you can add a new variable - the field marked with a purple frame.
- Displays variables selected as form fields - the field marked with a yellow frame.
- Edit a form footer. (Text which will be displayed below form fields) - the field marked with a orange frame.
- You can change the text of 'Confirm' and 'Cancel' button for the Action Launch Form - the field marked with a brown frame.
The most important steps in creating a form is assigning workflow variables to actions. The variables will hold the data provided by the users. The assignment can be made in the main window of the Form Editor.
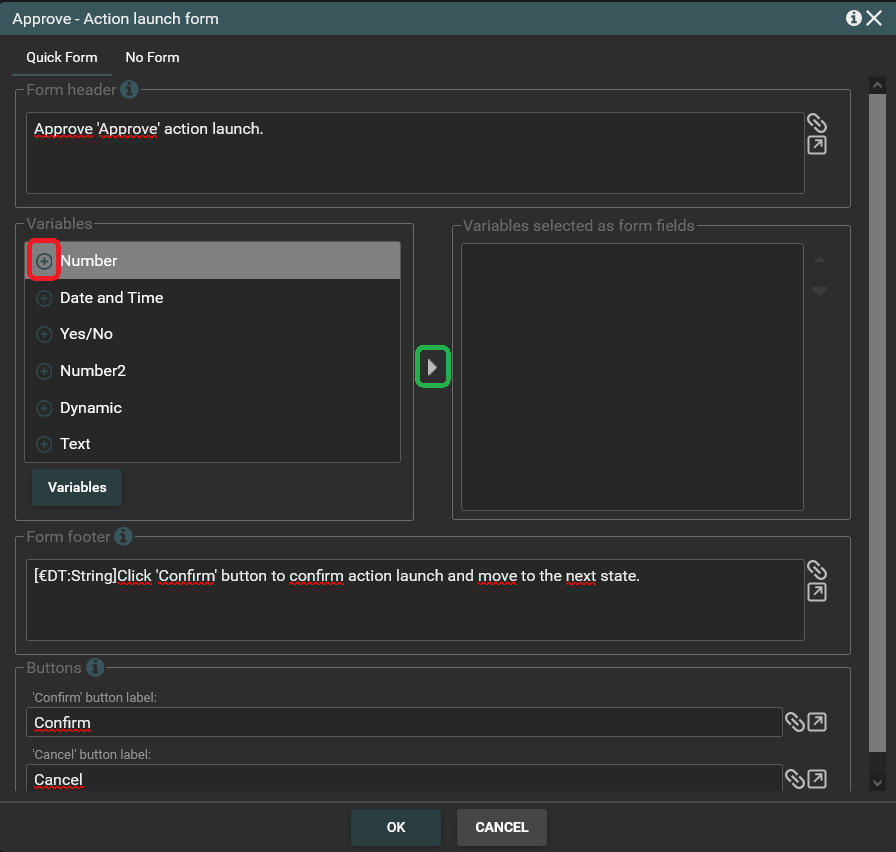
You can assign a variable in a following ways:
- By double clicking on the variable.
- By single clicking on the plus icon assigned to the variable. (Plus icon is marked with a red frame on the screen-shot above).
- By single clicking on the variable. The background of the selected variable turns gray. Then you need to click on the triangle icon marked with a green frame on the screen-shot above.
The variables assigned to the form will be displayed in the field marked with a red frame on the screen-shot below.
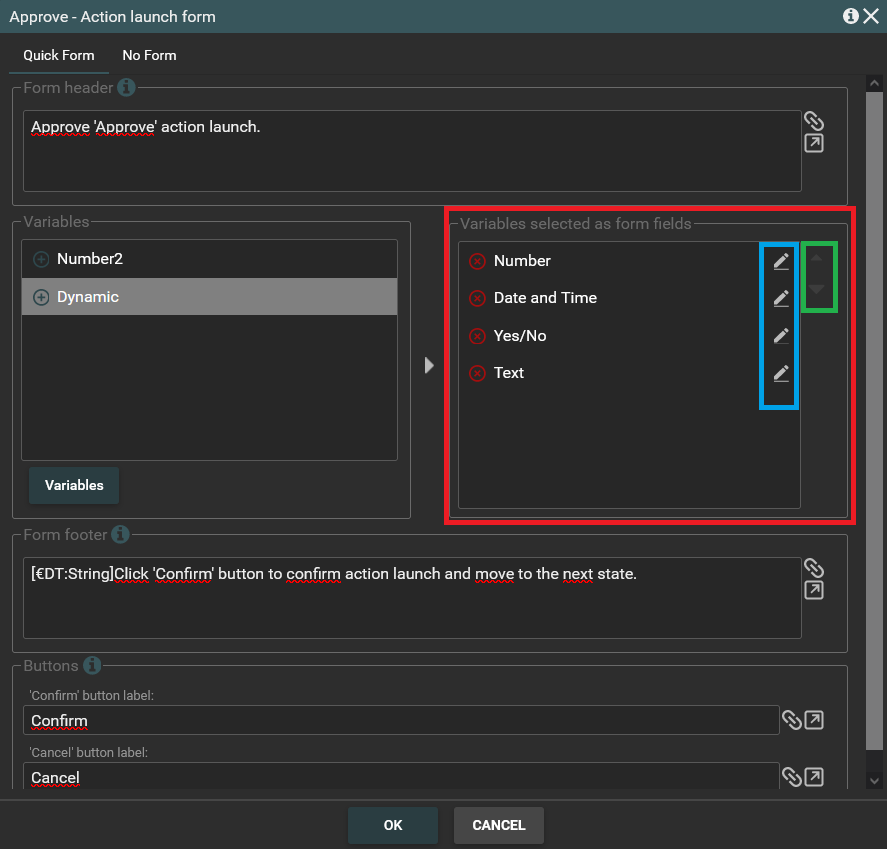
When you assign variables to the form you can click OK. The window will close. You can also stay in the window to make further settings. Do not forget to click OK after setting the Action Launch Form properties.
Button marked with a green frame - this button allows you to arrange the order of the form fields.
Each field has a set of properties defining its appearance and data it accepts. These properties can be set in a “Form field properties” window, which can be accessed by double-clicking assigned variable or a pencil icon (icon marked with a blue frame)
The "Form field properties" window looks like this:
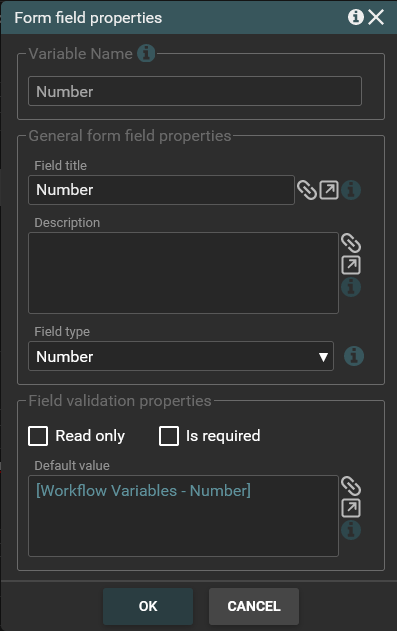
In window shows above you can:
- change field title
- give a description for the field
- set the field validation properties
- enter the value to be displayed in this field when the form is loaded
After settings the form field properties you should to click OK.
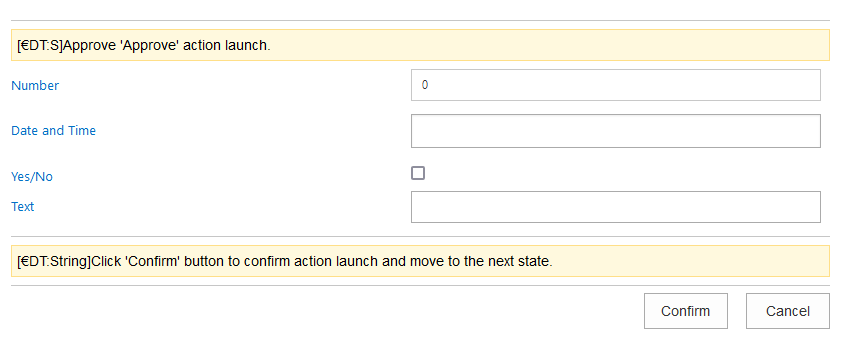
The action launch form will be displayed when the user click on the selected action to which the form is assigned. The action launch form looks like this.
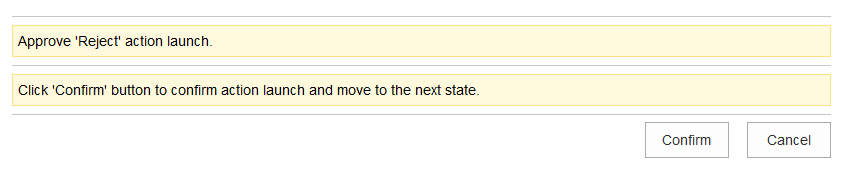
In addition to the form which can be filled in, tha application Datapolis Workflow has a "Quick Form" option for actions.
The "Quick Form" looks like this.
Note: It is important to understand the difference between workflow variables and form fields. Workflow variable is an abstract object where data is stored and from where it can be retrieved and used within the workflow.
Form field is a part of user interface, a place where user can enter data that will be assigned to the workflow variable. Fields are generated automatically when user initiates action execution. For each workflow variable assigned to a given action, one field is generated.
Each field has a certain type, associated with the kind of data it can gather. This is a simple way to require user to provide specific data. Also, the field will be rendered in such a way to help user in providing valid and well-formatted information. For instance, for the “Date time” field a date picker control will be generated.
Note: Workflow variables have their own types, so you can use only field types compatible with corresponding variable.